Monday, June 22, 2015
Happy Eats Healthy
We haven't gone away, we are just creating recipes that are a little lighter, a little healthier and with a lot more flavor over at Happy Eats Healthy. This blog still has a lot of great recipes (some healthy, some not as much) and is worth perusing.
But if you are looking to clean up your diet or just to start adding in a few healthier options, check out Happy Eats Healthy for recipes, tips, blog posts, classes, dinners and events focused on all things healthy and in moderation.
As a Food Network featured chef and certified health coach, I believe that food can tantalize the senses while still being healthy. I specialize in creating recipes that are based on whole, clean food with a focus on anti-inflammatory ingredients.
Being healthy is finally delicious!
Saturday, April 4, 2015
Savory Roasted Carrot Clafoutis
Eat the rainbow- this should be our mantras every day, at every meal, to help keep our bodies in tip top shape. There is a plethora of colorful vegetables available to us so why not? It's good for you and it makes food just flat-out more interesting.

Rainbow carrots are one such option - purple, red and yellow hues dance across the root vegetable to grab our attention. Is it the tantalizing color of these carrots that make us believe the taste is slightly better, more effervescent, than a typical orange carrot? Perhaps our mind plays trick on us but purple carrots are said to be a slightly sweeter while yellow carrots are more mild and less earthy. The resulting mixture of them is eye catching and inspiring- perfect for a Spring morning.
I was inspired by this recipe, mostly for the colorful layout of the vegetables. In my version, the final dish offers the intriguing line up of hidden color, only revealed after cutting and serving. Similar to a quiche, this savory clafoutis is less complicated, a bit richer and a bit more refined. Try adding a touch of sriracha or pesto to add a bit of punch.
Eat with your eyes and your mouth for a full sensory meal!
Saturday, March 28, 2015
Cardamom Honey Coconut Milk (it's an Aphrodisiac!)
A few weeks ago I was asked to put together an aphrodisiac platter for a Valentines dinner. The goal was to enlighten guests on how food can affect us while tantalizing their taste buds. Sure we had the essential oysters, but this was an opportunity go beyond and have fun with it.

Coconut milk is a lesser known aphrodisiac. Aside from being delicious, coconut milk enhances sexual desire. But plain milk is a bit dull so we took it a step further and added cardamom and honey to really boost the power.
Cardamom is a warming spice that heats up our sex drive and honey is one of the best re-generators of sexual energy.
Drink this lovely elixir as a warm tea, add it to your coffee or use it as a base for your smoothie. It's good for your and your libido!
Saturday, March 21, 2015
Warm Grapefruit, Avocado and Wild Rice Salad
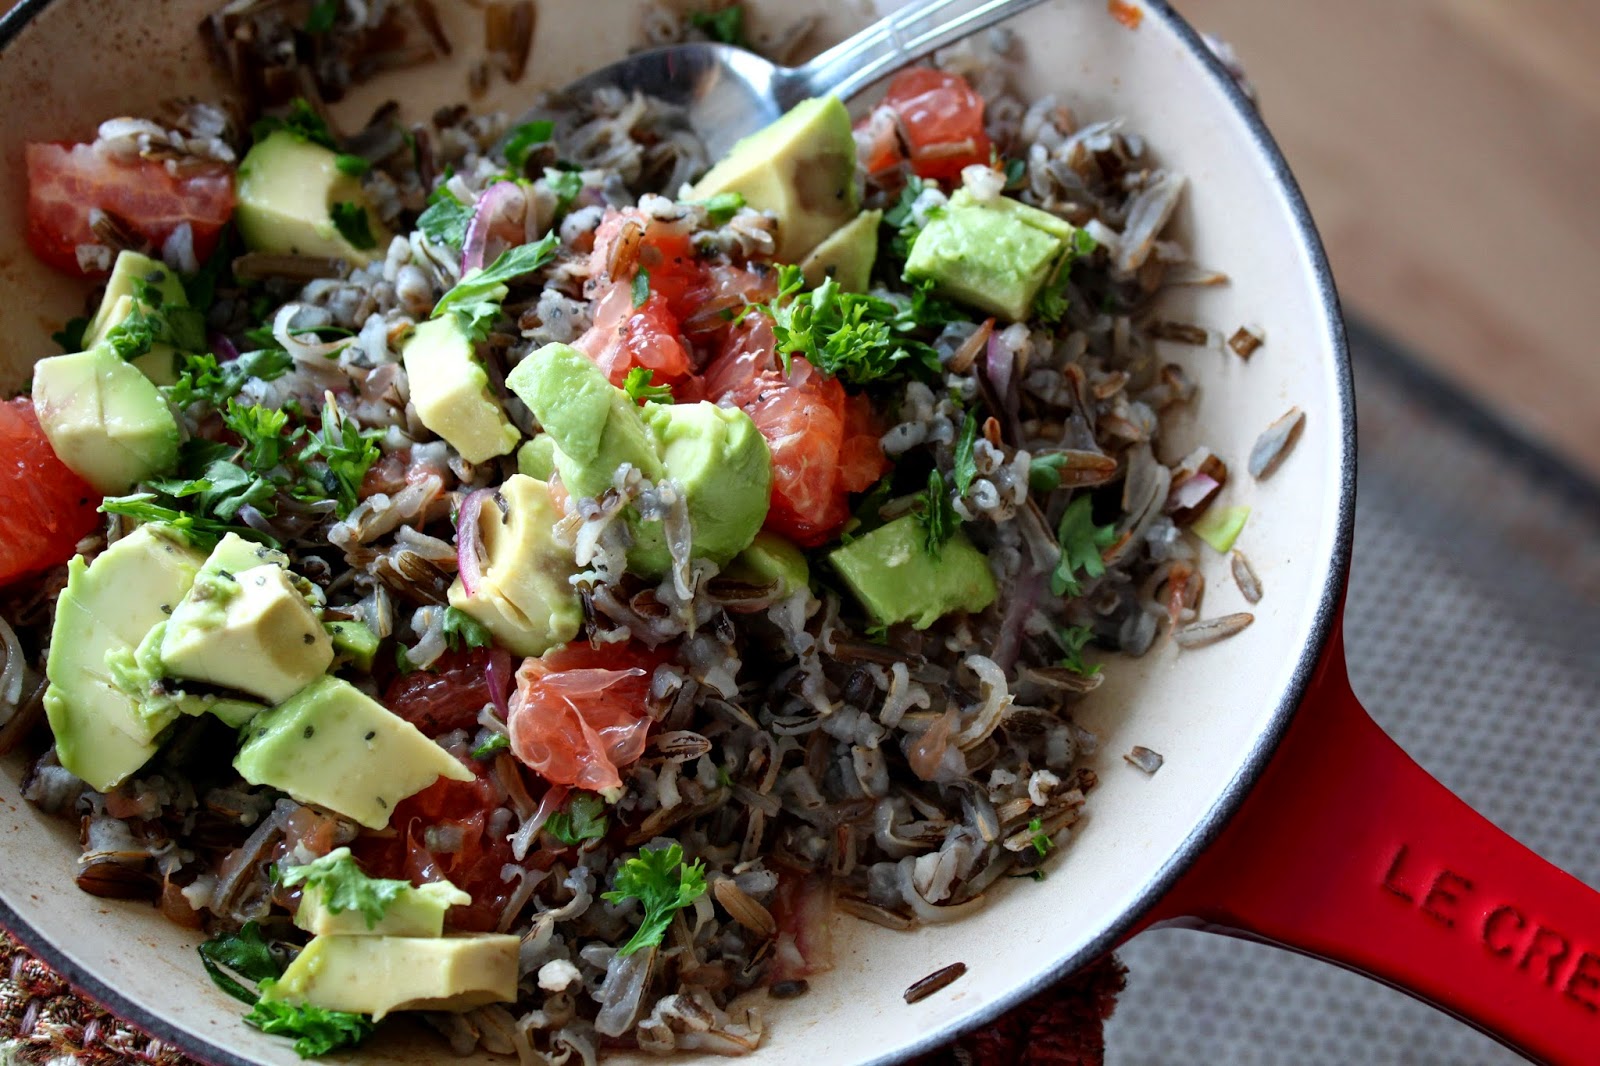
When I put this salad together, I wanted the freshness of the grapefruit to play off the nuttiness of the wild rice - adding a heavy salad dressing would just drown the flavors out. Using the juice that drips out of the grapefruit while you are peeling and cutting it moistens the warm rice (along with a touch of coconut oil) with a clean dressing that highlights the flavors.
Toss in fresh parsley and greens at the end for a crisp, familiar salad crunch and a hist of coolness against the cozy rice.
An air of crispness over a blanket of warm- just like Spring. It's the perfect use for leftover wild rice and a great reason to cook it if you don't have any leftover.
Saturday, March 14, 2015
Happy, Healthy and Delicious Good-For-You Shamrock Shake Smoothie
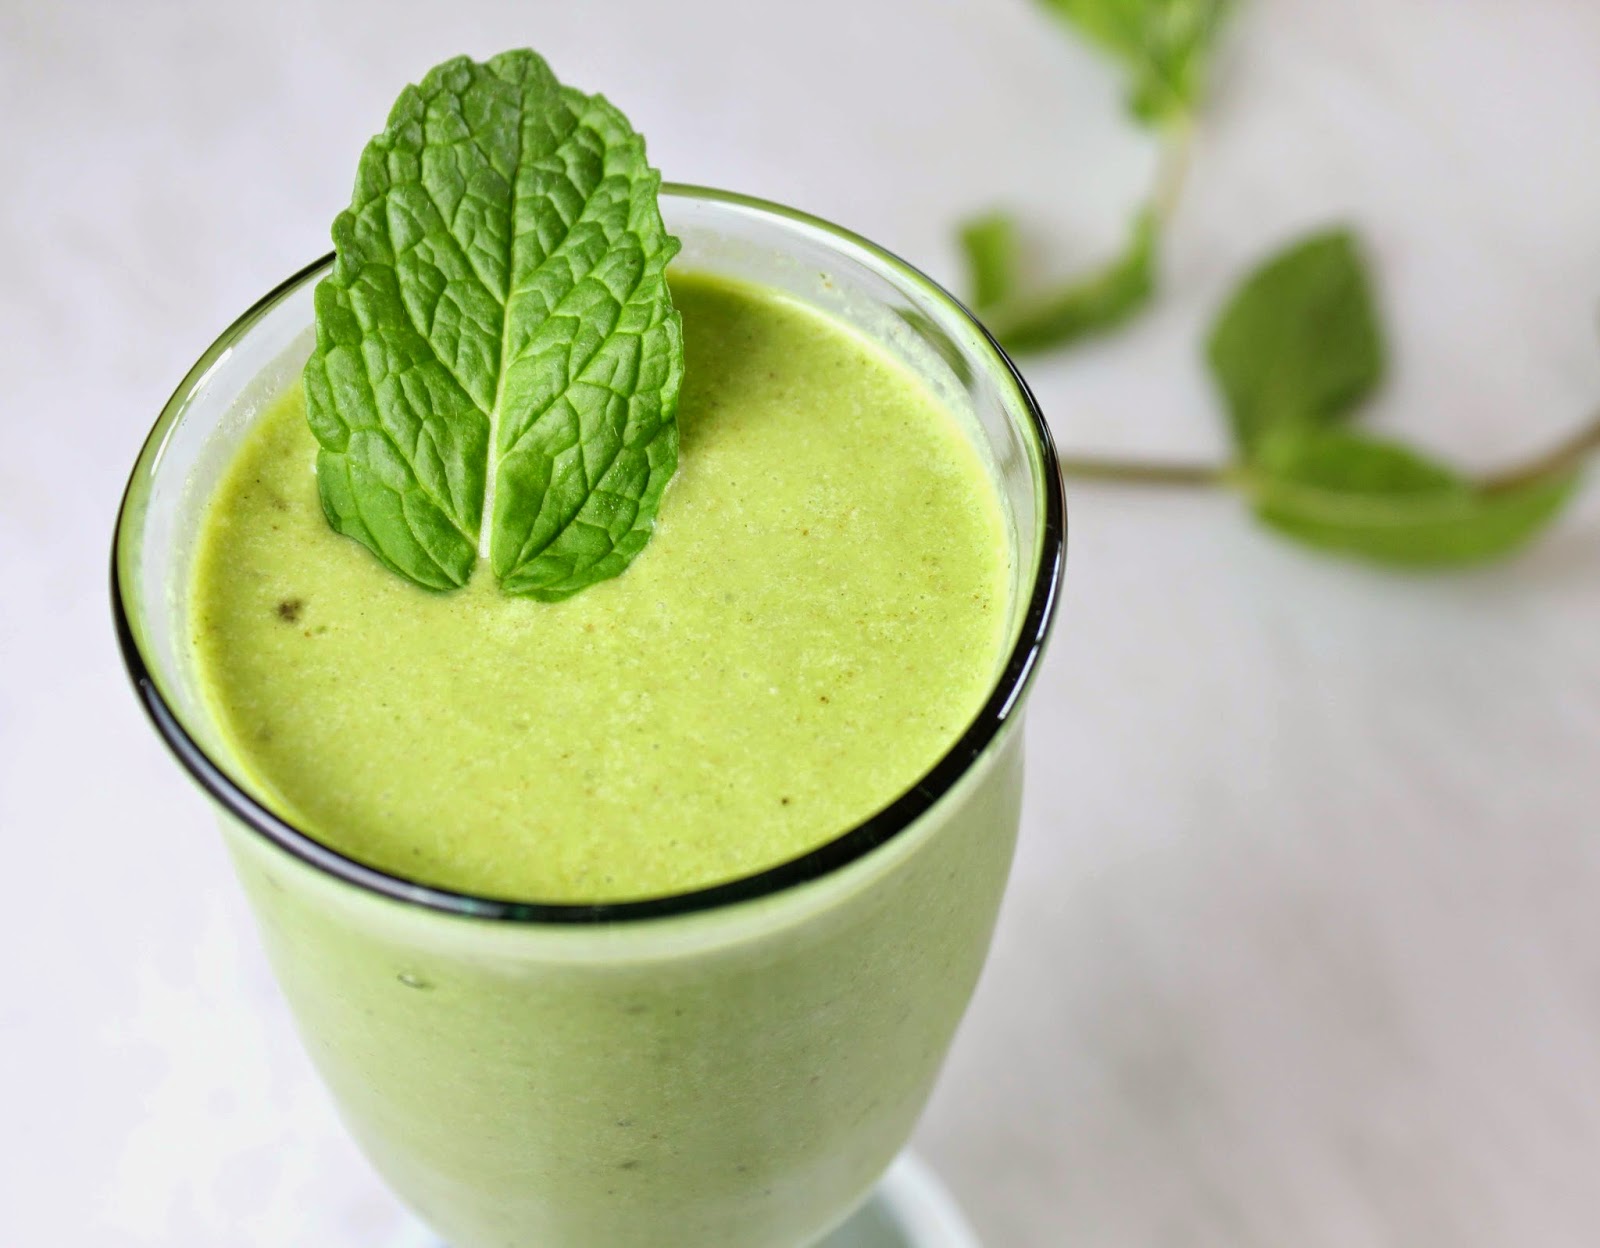
Do I even need to recount how terribly bad for you the traditional McDonalds Shamrock Shake is? Yes, there was a time when I lived for them, longed for them and loved them! But that was a long time ago and I know better know.
I still crave that creamy minty taste though and there is no reason not to satisfy the taste buds, especially when we can recreated this the shake in a healthy way!
There is reportedly over 50 ingredients in the fast food shake version, many of those being versions of sugar. My rendition is just a creamy and even more minty than the original while making use of natural dates for the sweetness.
And I see no reason to limit this delightful smoothie to only one time a year - now you can have a bit of minty shake anytime and feel good about it!
Saturday, March 7, 2015
Turkey and Mushroom Meatball with Olive Cream Sauce over Sweet Potato Pasta

I'm constantly tip-toeing the line between healthy food and food that others actually want to eat. For the record, my friends do like the food I create, but they also crave those classic fatty comfort dishes...especially during these blasted cold months.
In this comfort dinner redo of classic spaghetti and meatballs, swapping sweet potatoes for pasta may seem completely out in left field, but when quickly sauteed in a touch of butter these faux 'noodles' are delightfully chewy and satisfying. Yes, I did say butter; once in a while a touch of high quality butter really does the trick (though ghee, olive oil or coconut oil would all work as well.)
To take the sweet potato linguine a step further I tossed in a garlic cream sauce made from cashews. I know it sounds weird but if you haven't tried making cashew sauces, you really need to. Cashews are the new bacon ... not quite. But they create an amazing base for desserts, mayos, dips and so much more. My olive cream sauce has a bite from the raw garlic, but the salty spicy combo shines against the buttery sweetness of the 'spaghetti'.
Saturday, February 28, 2015
African Sweet Potato Almond Stew
 I have fond memories of an underground dinner in Buenos Aires where the first course was an African Peanut Soup. It was creamy with a defiant touch of peanut butter. This recipe is a play off of what I remember that soup to be, subbing in almond butter for a healthier boost of good fat and protein and adding in sweet potatoes and kale to really add to the veggie count.
Served as a stew, my version is chunky and hearty with a rich and creamy sauce, slightly less sweet without the use of store-bought peanut butter. A blend of sun-dried tomatoes and an ancho chili pepper give more depth and flavor than using just plain tomatoes. A touch of vinegar at the end adds just a hint of brightness; sub a squeeze of lemon or just skip this step if it makes you nervous.
It's the perfect stew/soup for those still riding out freezing temperatures; just cup your mug, close your eyes and let the flavors take you to a warm sunny spot south of the equator.
Saturday, February 21, 2015
Subscribe to:
Posts (Atom)